INTRODUCTORY DISCLAIMER!! So I began writing this post about 2 weeks ago. I was waiting until I had some final shots in order to post it but then I had a baby :) I still don't have those final shots, maybe one day you'll get to see the completed project. Right now a newborn has taken over it and we couldn't be more thrilled [
more to come one that in another post]. But for now, you'll have to be okay with perusing my creative endeavors one by one. We'll be in touch soon!
-------------------------
Finally. At least I think so. I'm not sure there's room for anymore decor to be added, so
surely I'm done. I think it's just the hesitation to claim that Haddon's room is ready because then I think he'll come scrambling out as soon as possible and we'll never be "ready" for that! [
Yes, I do want our son to arrive, but I'm perfectly fine with him sticking it out through his due date. We still have more "to-dos" to check off in the Pugh home. But yes, God is sovereign and we will welcome our HadMan with open arms when he decides to join us on the outside. Okay, disclaimer ended...]
Back to Haddon's little home in the PughPlex... I've had
so much fun with the task of preparing a place for him. Not only do I get the joy of getting my craft on, but it's for
him.
Our son. I know he won't have lasting memories of our Auburn home, but it's still been fun to do. Let the tour begin!
So from the beginning, I was going from a color palette as opposed to a specific theme. Call me dorky, call me an art snob, but I
really like my color palette. Here's a preview of some color inspiration for you to get an idea of where this will all end up.
 |
| The primary players consisted of teal, brick red, sage(ish) green, and a golden/mustard yellow. |
My first major project was the dresser. We were blessed to find this beauty on the side of the road and my mind was scampering away with how I was going to give it a makeover.
This thing was going to be teal and there was no stopping me! [
In case you don't know me super well, teal/turquoise, is probably my favorite color. If you've seen my car, the Mermaid, then you're very aware of this...]
 |
| I went with the dry brush technique to make it look somewhat distressed and textured. I know, I know - so trendy, but I really had fun with it and was very pleased with the results. |
On to the hardware! I probably spent at least an hour rummaging through bins at Mike's Merchandise in Auburn before I came up with my final selection. In my defense, they just have a bunch of random handles in about 20 different bins - so it's an adventure to find what you're looking for. This
may have encouraged my lets-just-do-a-bunch-of-random-ones approach!
 |
| Before... |
 |
| After! |
Bring that all together and... TADA!
 |
| Hopefully Haddon will share his mother's love for color - there's no getting around it now! |
Now it's time to get something on those walls. Enter project #2...
What I have here are some canvas stretchers [
to make (3) 12"x24" panels - you can find these at Hobby Lobby on the canvas aisle], fabric and wooden letters.
The stretchers are very easy to assemble and I just secured the joints with a staple. The staple gun is your best friend for this project. I love that I just said that, because this project involved a very sanctifying story involving the staple gun. Let's just say I cried a lot and made multiple trips to Walmart and Home Depot. So embarrassing. In the end of it all, I now know how to properly load a staple gun...
 |
| Stretch and staple the fabric down on the frame. |
 |
| Finished panels! I recommend not using stripes, they're not as forgiving as other patterns. Hence the ripples... |
 |
| Final product! I spray painted the letters silver and glued them onto the panels. I transferred his name onto the H using a handy little trick I learned in college with a blender pen and xerox copy of the text. |
On to the next project!
Enter Pinterest nightmare... I followed
this little tutorial and was miserable. It's not the tutorial's fault, it just wasn't as fun as I thought it would be.
I was very pleased with the way they turned out, just don't think I could make them again. Ever.
So maybe I was a little dramatic on this one. Here are some helpful hints if you would like to pursue this craft:
- Make sure your yarn pieces are 3 feet long [at least] like the tutorial suggests. The longer the string, the easier it is to place and work with.
- It calls for thin cotton yarn - yes, yes, yes. Thin + cotton = ideal yarn to use. This will also make it easier to work with.
- It says equal parts glue and water, but I would go heavier on the glue.
Moving right along... The next project is one done from a handful of of frames I bought from the thrift store.
 |
| Ignore the centerpiece. I ended up using that element elsewhere. |
 |
| Painting the frames - staying true to that color palette! |
And the finished product...
 |
| The mirror in the middle is also a thrift store find. It had a few scratches on the frame part, so I just used sandpaper all over to give it a "brushed metal" look. Worked like a charm! |
 |
| The items framed are some random, fairly neutral, scrapbooking paper I found as well as some pages from a typography magazine. |
 |
| Thanks to mom and dad for the beautiful crib! |
Another little decor detail for your viewing pleasure is my button accented lamp. Very minimal, but it added a little character to a plain white lamp we had in our living room that got confiscated for the HadMan's setup. I initially had something like
this in mind, but didn't have enough buttons on hand and decided to go with something a little more subtle.
Another accent piece to add a little color to the crib is this fun little banner.
I used the fabric left over from the panels I made earlier, as well as some of the paint from the frame project to make this little guy. I thought it was a fun little addition!
My next wall pieces were achieved with three $5 Walmart frames and mirrors. I forgot to take a before picture, but the frames were a lighter wood color and had mat board in them so that you could frame 4 smaller pictures in them. I got rid of the mat board and just used the entire space to frame collages I made from scrapbook paper and burlap fabric. I used the dry brush technique again to paint the frames a darker brown to match our crib and glider. Here's the end result!
 |
| KamPughs self-portrait included free of charge :) |
 |
| This is the framed collage on top. |
 |
| This is the framed collage on bottom. I included a piece of the mirror's frame so you could see some detail in that as well. |
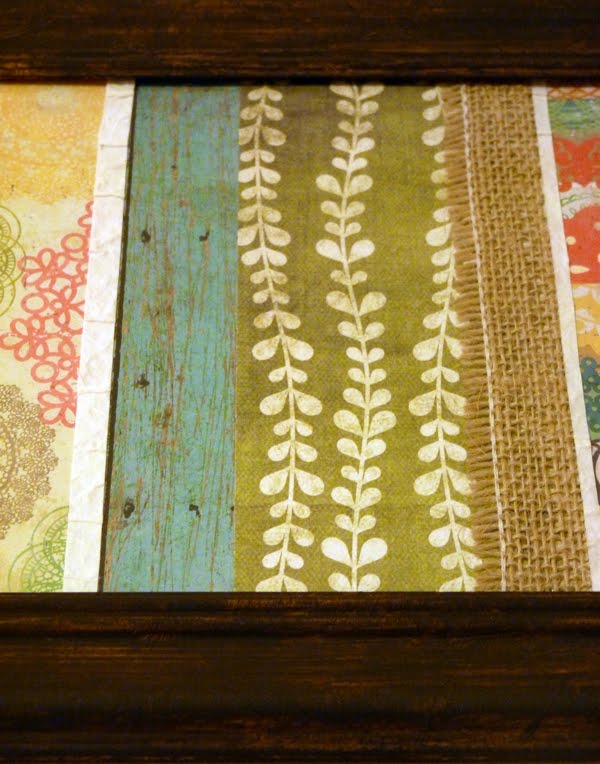 |
| Collage detail. Hooray for fun scrapbook paper! |


